Secure Messaging is a tool on Peregrin Manage that allows financial institutions and credit counseling agencies to communicate sensitive information securely in an encrypted environment.
Secure Messaging - Inbox
TABLE OF CONTENTS
- Sending New Messages
- Remind to Reply
- Email Notifications
- Viewing Messages
- Reading Messages
- Forwarding Messages
- Auto-Forward Messages
- Replying to Messages
- Trashing Messages
- Draft Messages
- Searching Messages
- Templates
Sending New Messages
Click on the Secure Messaging section of the left menu pane.

To send a new message, select the Send Message button at the top of the Inbox screen.

If you are a member of multiple mailboxes, you will need to select which mailbox the message should appear to come from. Reply messages will return to the selected From: mailbox.

Choose recipient(s) by typing the organization or mailbox name you wish to reach and selecting it from the list that populates from our search results. You may select more than one recipient. All reply messages will only be returned to your mailbox and will not include any of the other recipients of your original message.

You may select up to 10 attachments up to the collective file size limit of 200 MB.
Enter a Requested Reply by Date if desired and select one or more Templates to begin composing your message. Once ready, you can send your message by clicking the Send button at the bottom of the screen.
Remind to Reply
Trigger a friendly reminder after three days if your message has not been replied to yet. To access this feature, go to the Secure Messaging section, click on the Sent tab, select the message you wish to receive a reply to, and click the Remind to Reply button at the top of your screen. This will cause the message to appear as a bolded unread message in the recipient's Inbox tab along with a Reply by date if on was selected.

Email Notifications
To receive email notifications of unread messages, select the Email Notices toggle button.

You will receive a pop-up with choices for immediate or nightly email notification. You may select one or both. To save your selection, click the Change Email Notices button. 
To stop all email notifications, click the Email Notices toggle button to switch it "Off".
Viewing Messages
The default view shows all messages in all mailboxes for which your user is a member. To view messages in only one mailbox, choose your selection from the Mailbox dropdown menu on the upper right of your screen.

To sort your inbox by any field, click the column header. Double clicking will reverse the sorting order.

Reading Messages
To read a message, click the row you wish to view. You may mark that item unread by clicking the Mark Unread button on the top of your screen. This will return the message to an unread status and the item will appear bold in the inbox once again. Please note that all activity will appear in the Message Activity History of the message, including all times a message is read, marked unread, and replied to.

Forwarding Messages
To forward a message from one mailbox to another within your own organization select the Forward button on the Message Details screen.

On the Forward Message screen, in the Forward To section, select the mailbox you wish to forward the message to.
You can now optionally add a Note to be sent along with the forwarded message.

Notes will appear within the Message Activity History of the message for your organization only next to Forward Notes. (Notes cannot be seen by any other organization.)
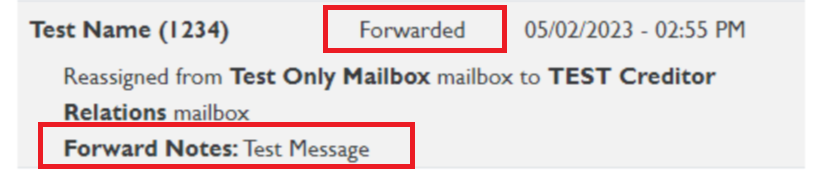
Once a message is forwarded, it will be automatically updated to unread status of the selected mailbox and no longer appear in the mailbox it was forwarded from.
Note: Forwarded messages do not trigger an immediate "New Message Received" email notification, but they will trigger the overnight "Unread Messages" email notification for users with the "nightly notification" option selected.
Replying to a forwarded message will be sent to the organization's mailbox that sent the original message.

Auto-Forward Messages
Any user with an Individual Mailbox can now automatically forward messages received within a given date range to another Mailbox. To activate this feature, click the Auto Forward toggle at the top of your Messaging screen, next to your Email Notices toggle.

Note: You will not see this feature if you do not have an Individual Mailbox assigned to your username.
Select the Auto-Forward toggle and fill out which group mailbox and the time frame you will need your messages forwarded.
 You will then get confirmation that an Auto-Forward was created and can see those dates next to the toggle.

If you need to turn off auto-forward before the time frame is over, click the toggle to switch it Off and messages will stop being forwarded.

Replying to Messages
To reply to a message from the Inbox view, select the left arrow icon on the left side of the message row or click the Reply button at the top of the message details screen.

All text from the message thread will appear in the Responding To section under the Message body.

Trashing Messages
To remove a message from the inbox view, select the trash icon on the left side of the message row or click the Move to Trash button at the top of the message details screen. Messages that are sent to trash will continue to be available to view in the Trash tab until the message retention date.
Quick Trash
You can now move a message to your Trash tab with a single click. To access the message until it’s retention date, simply navigate to your Trash tab to view the message.
Note: Messages moved to the Trash tab are moved for your view only. You cannot move a message to the trash tab for other members of your Group Mailbox.


A message can be restored to your inbox by opening the message and selecting the Restore to Inbox button.


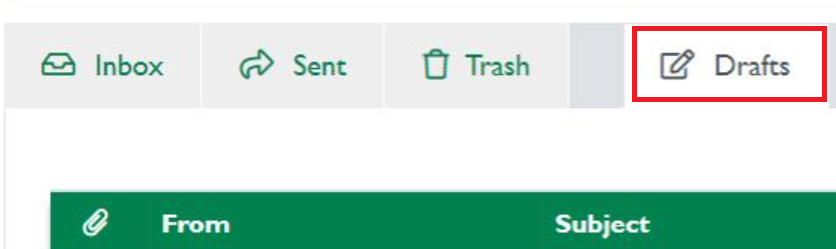
Draft Messages
The Draft tab allows anyone within a mailbox to access drafts that have been saved to send later. When creating a new message or sending a reply to a message, items with asterisks must be filled out to save the draft.


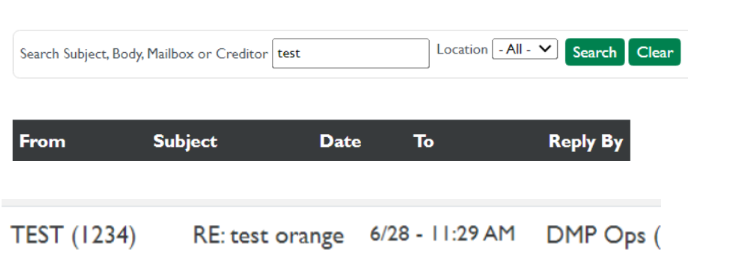
Searching Messages
Search tab is available to help you locate any message you are looking for, inbox, sent, and trash folders.
 Enter keywords, use location dropdown, and select Search to locate messages.

Templates
Templates contain canned text that can be inserted into any new or reply message. Templates can be created by any user and are viewable by all users within your organization. Management and Upper Management level users are able to modify any template. Please see Secure Messaging: Mailbox Management for more on user permissions.
Click the Manage Templates button at the top of the inbox screen to edit, delete, or add new templates.

Templates can be added to any new or reply message using the Insert Template dropdown menu.

08/2024